
“Old English Eōstre continues into modern English as Easter and derives from Proto-Germanic *austrōn, itself a descendant of the Proto-Indo-European root *aus-, meaning ‘to shine’ (modern English east also derives from this root).[3]
Writing in the 8th century, the Anglo-Saxon monk Bede describes Ēostre as the name of an Old English goddess and behind the name “Esoturmonath”, the equivalent of the month of April.” ~ Wikipedia
***
“Easter is calculated as the Sunday that follows the first moon after the vernal equinox. It is evidence of a concern centuries before Christ to coordinate the lunar and solar calendars. What we have to recognize is that these celestial bodies represented to the ancients two different modes of eternal life, one engaged in the field of time, like throwing off death, as the moon its shadow, to be born again; the other, disengaged and eternal. The dating of Easter according to both lunar and solar calendars suggests that life, like the light that is reborn in the moon and eternal in the sun, finally is one.” ~ Joseph Campbell
***
A little while back, my husband (who is Ukrainian) told me that his mother would simmer eggs in onion skins for Paska (Easter) to dye them. As an herbalist, fiber artist, and plant dyer, this made a lot of sense to me. Onion skins make a rich, deep tawny brown color when dying with them. Apparently, there is a long, long history of making krashanky in Ukraine.
“Krashanky (in Ukraine) — from krasyty (красити), “to decorate”, known in Poland as “kraszanki” or byczki — are simple colored hard boiled eggs, and intended to be eaten after being blessed in church on Easter. They were traditionally made by boiling an egg in a decoction of plants or other natural products, usually onion skins, which cooks and dyes them a single color. The colour of krashanka depends on the dyestuff used:
- dark red/brown: — onion skins;
- black: — oak or alder bark or walnut shells;
- gold: — apple tree bark or marigold flowers;
- violet: — mallow flower petals;
- green: — rye shoots or periwinkle leaves;
- pink: — beet juice”
~ Wikipedia
Last year I saw a post where someone made botanical prints on their Easter/Eostre eggs. So, I made a mental note of that and made sure to remember it when April rolled around this year. It’s a fun spin on traditional krashanky.
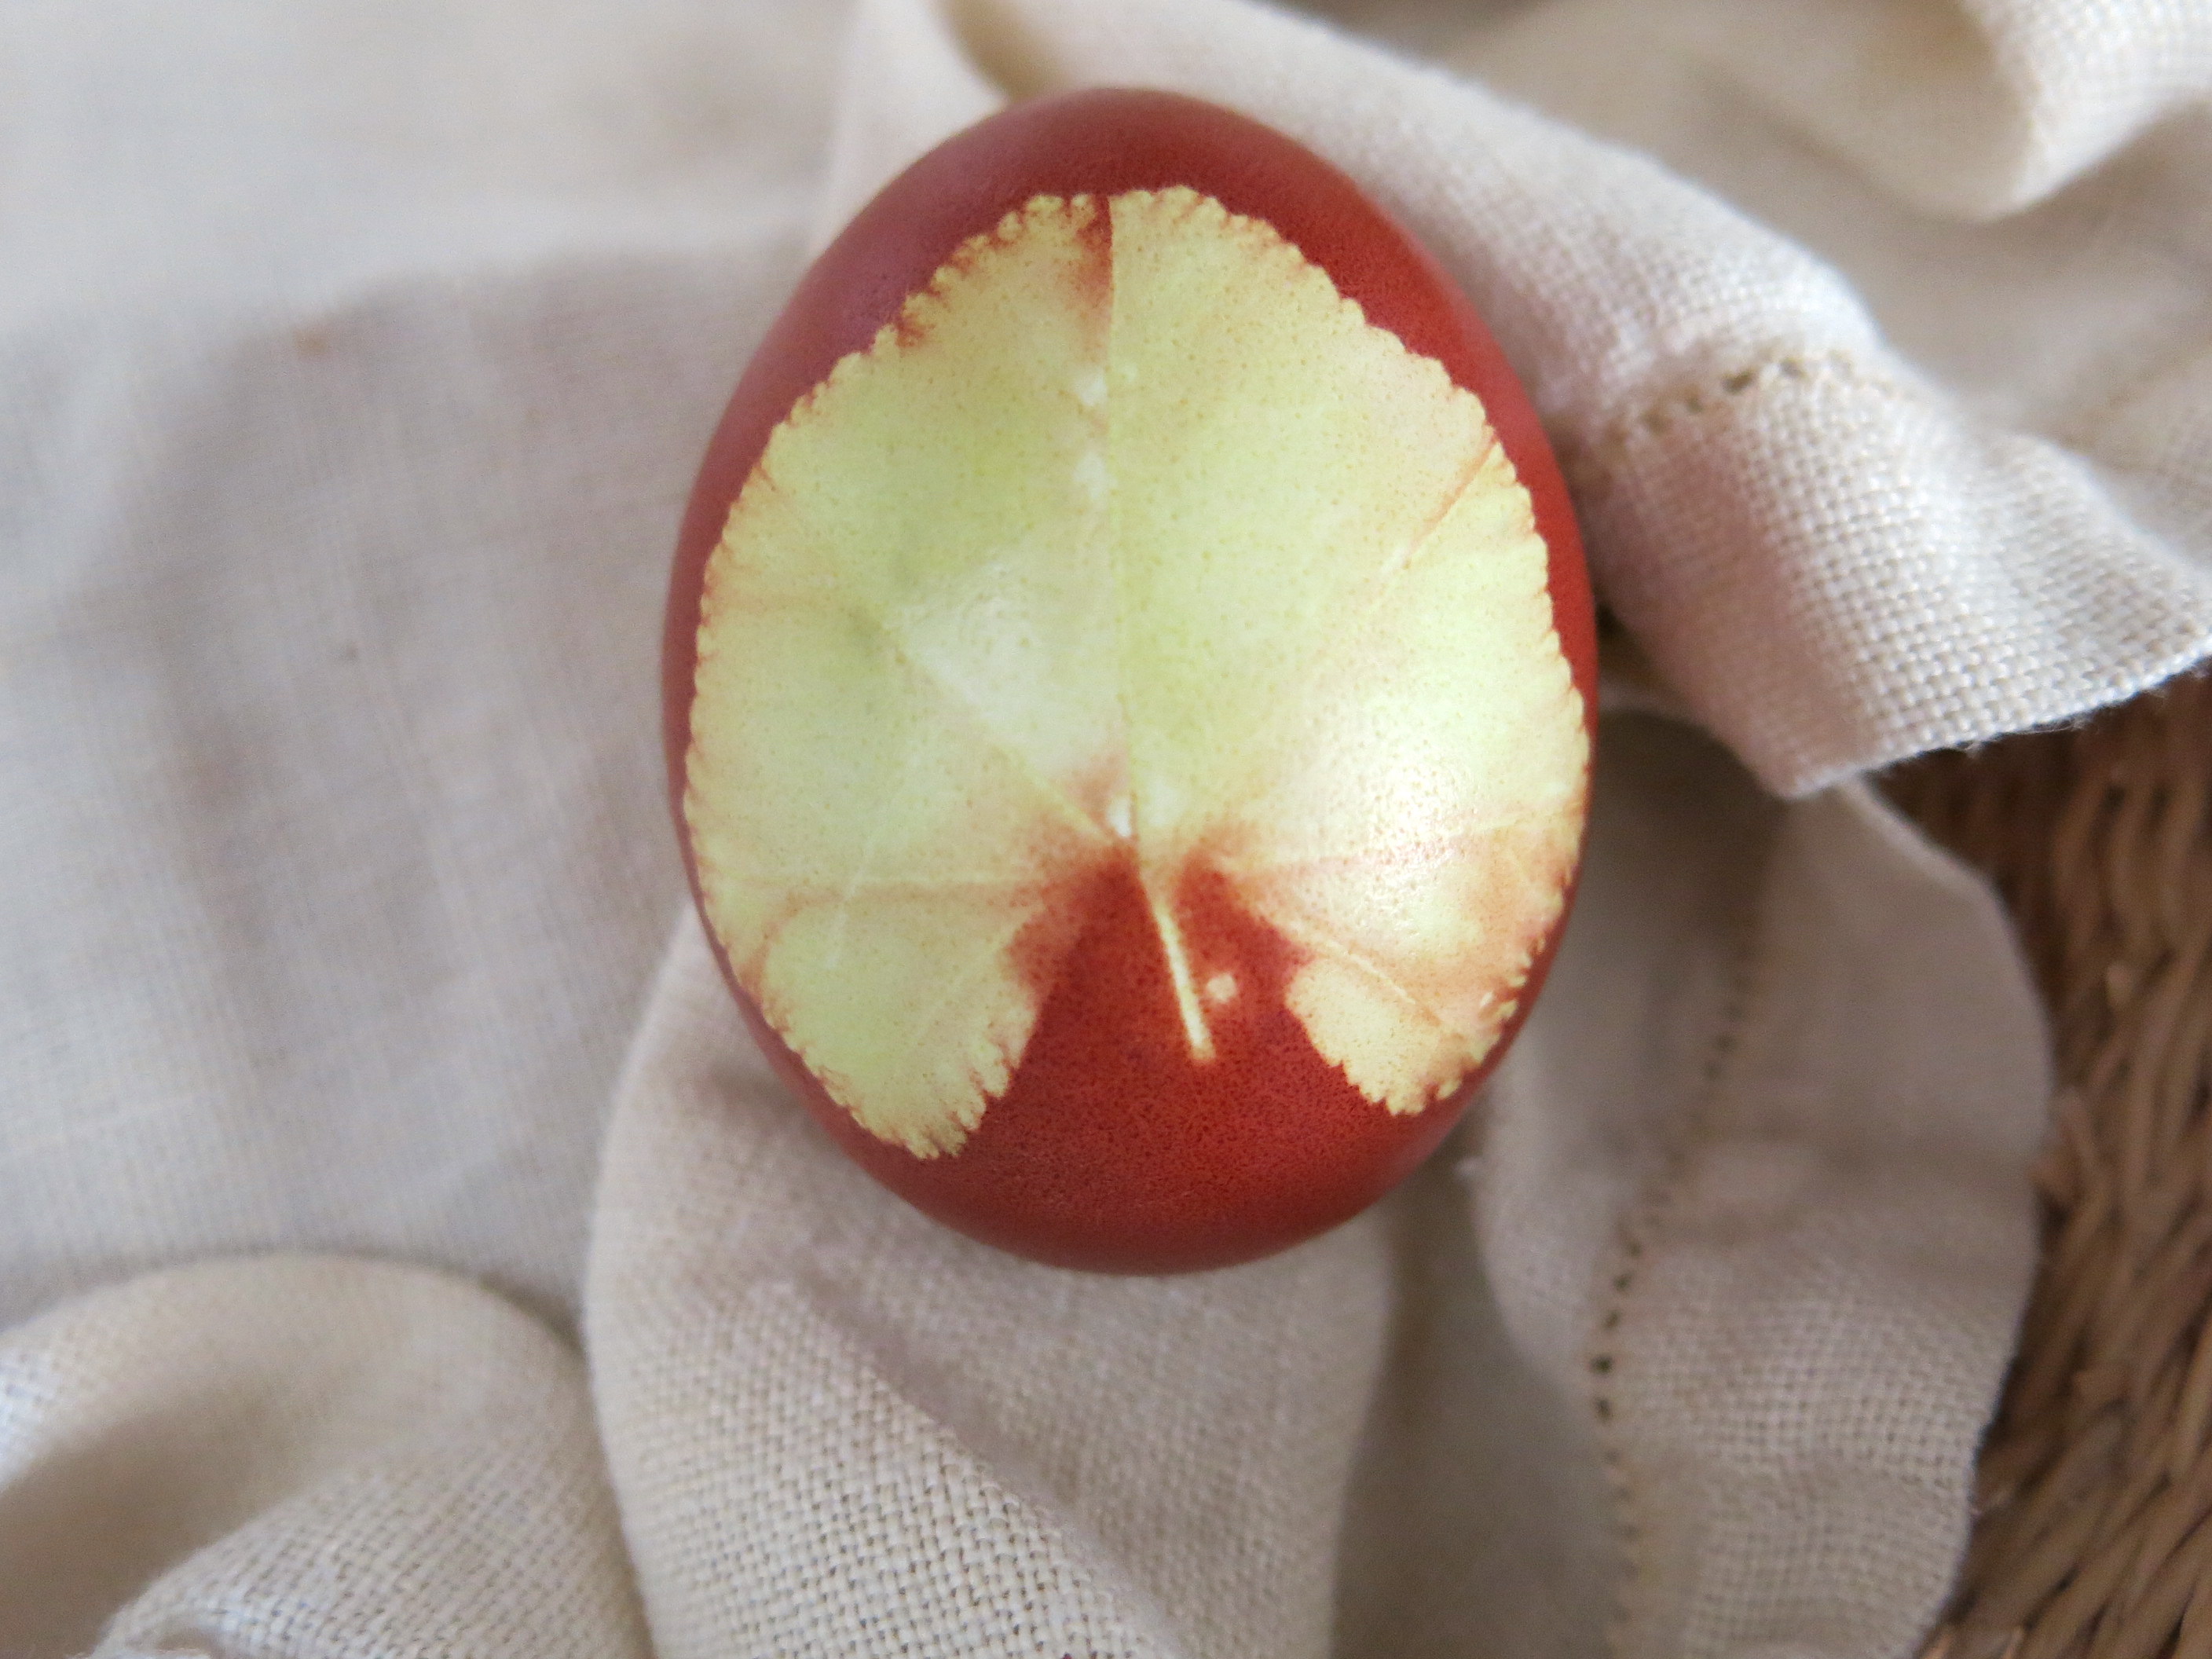
Today, my daughter and I finally got around to exploring this egg dyeing process. For weeks, I had been saving our yellow and red onion skins (you can use shallot skins as well) in an open plastic bag on top of the fridge, anticipating this day. And, after harvesting plant material for botanical prints, bundling, and dyeing them…we were very satisfied with the results.
Actually, this has been the best egg dyeing experience I’ve ever had and everything was from the kitchen and the field and forest. It was extremely pleasing to unwrap each egg after simmering them. They were like small packages of botanical print surprises.
So, it’s your turn. I’ll walk you through the process.
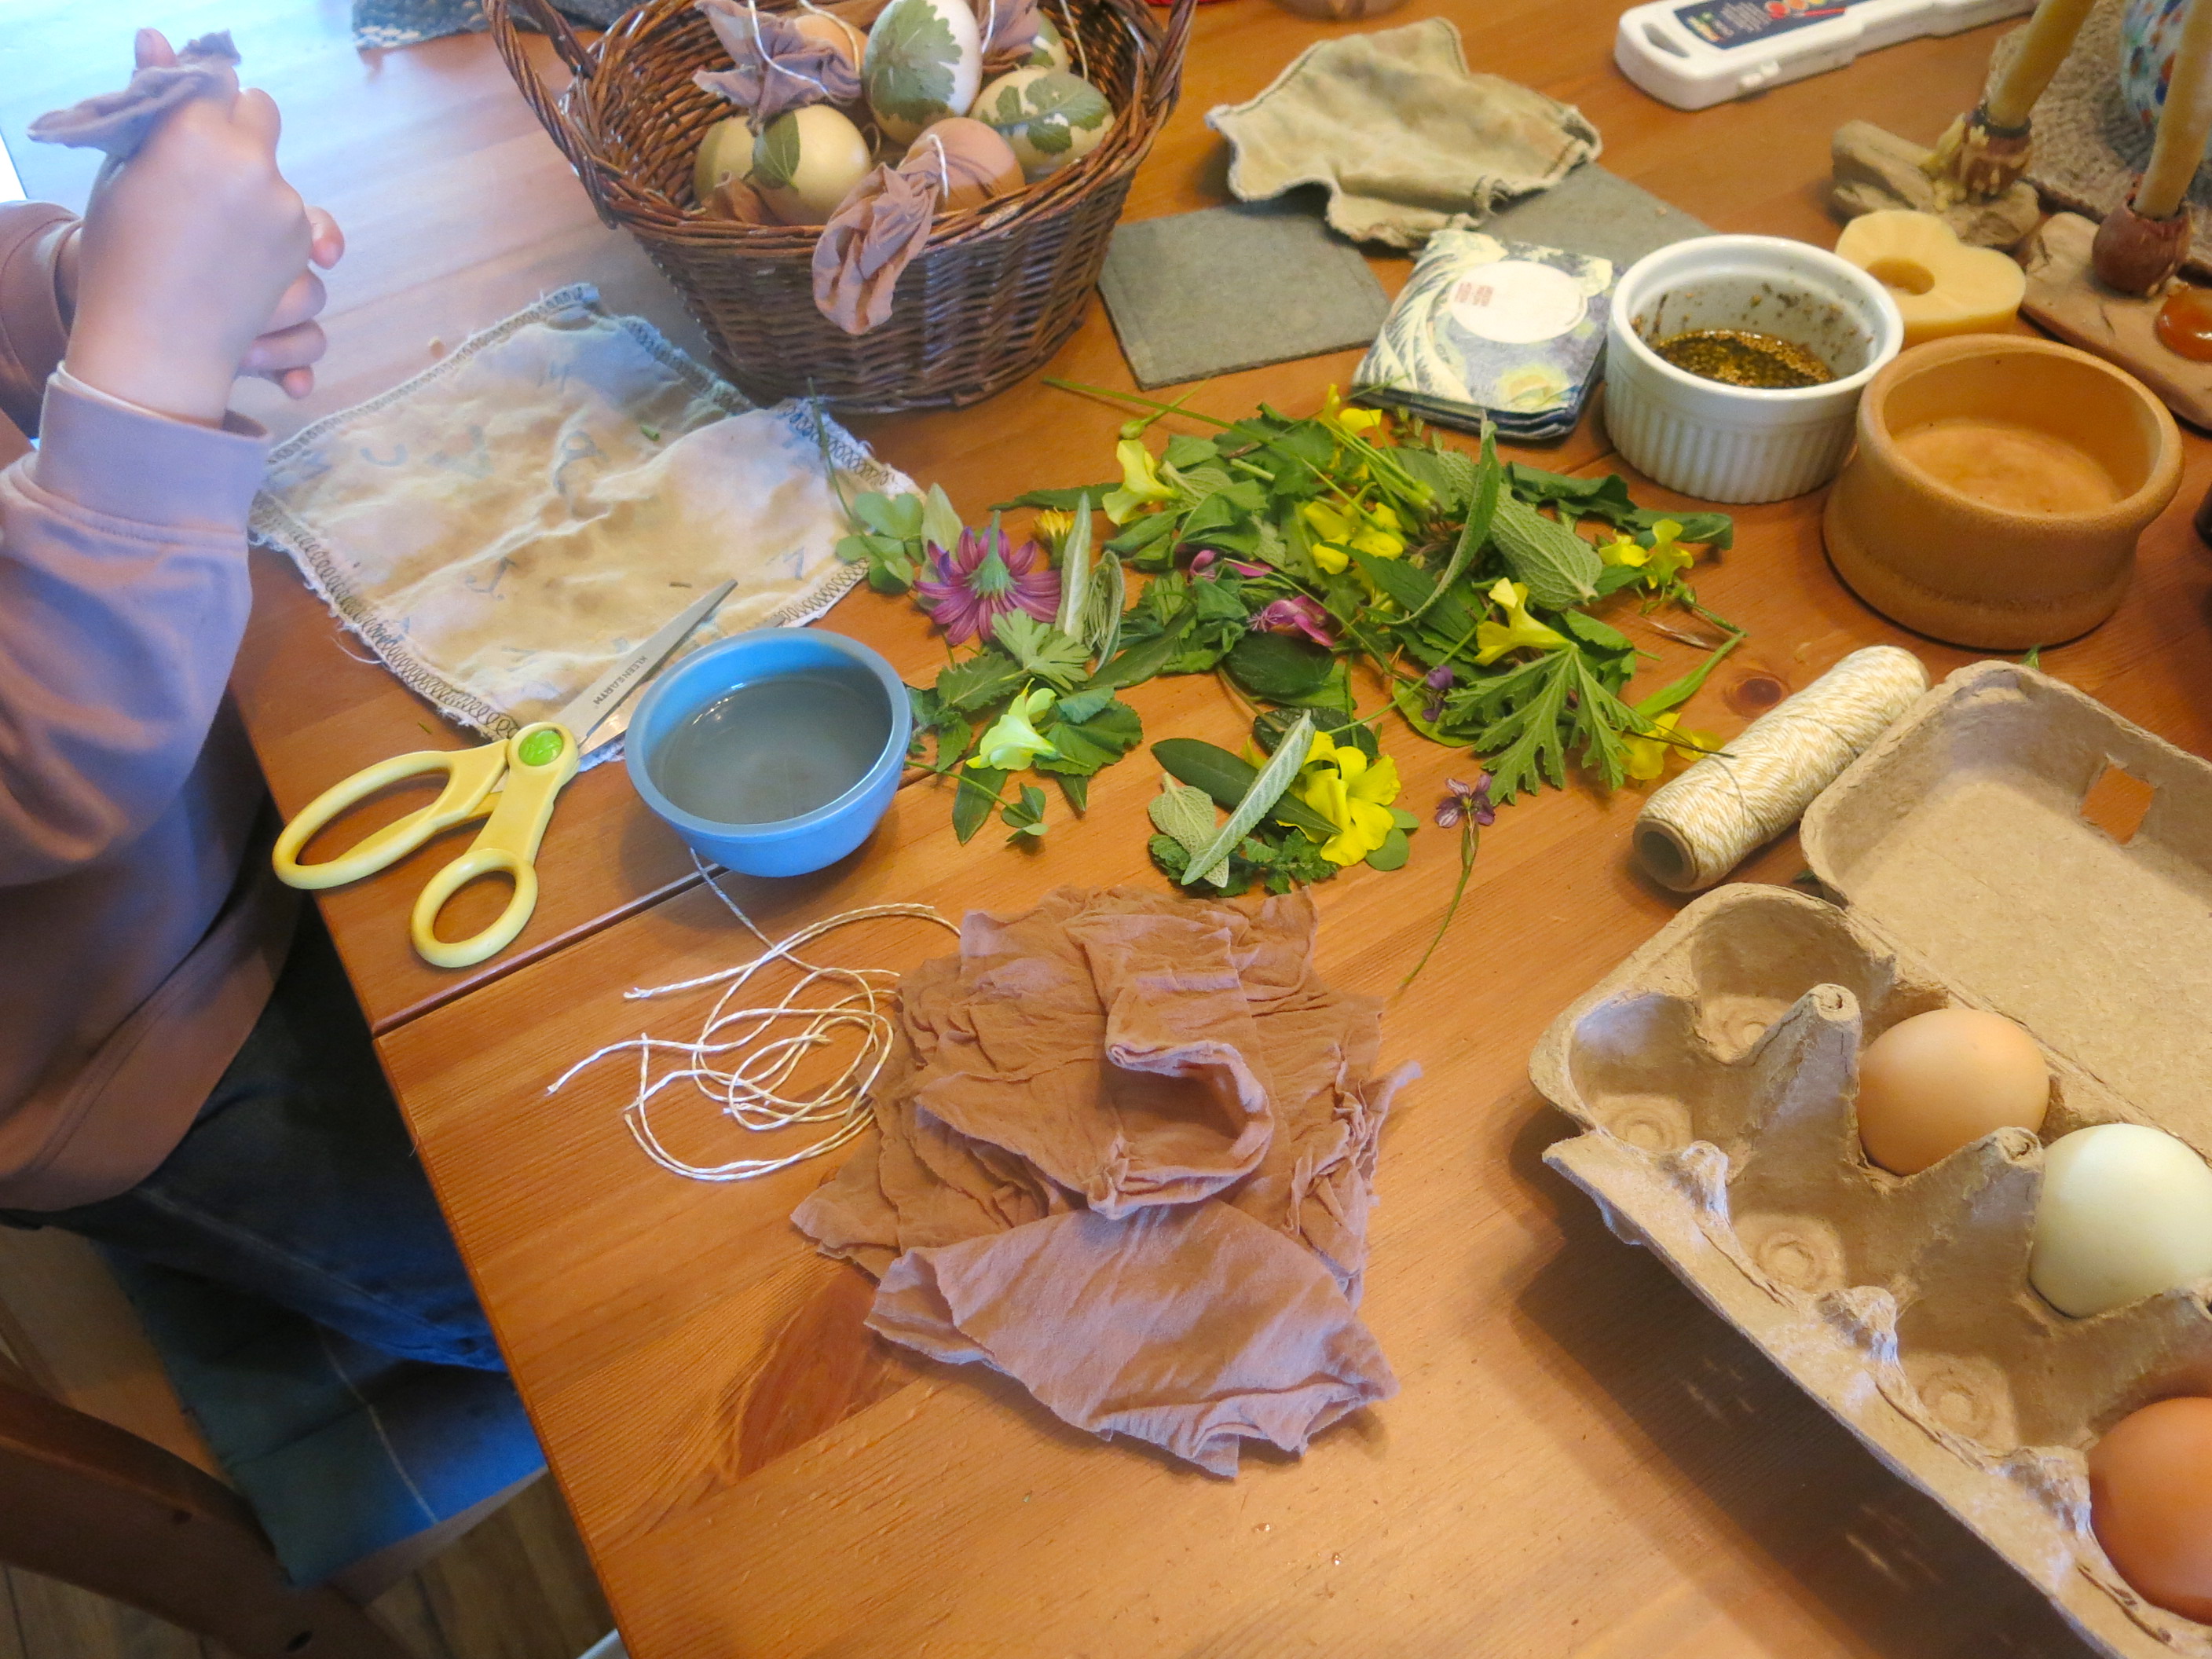
You will need:
Nylons cut in 4″ lengths (cut the legs into cross sections and then cut that in half)
Onion skins from about 15 onions
Pot to simmer the onion skins
Leaves and flowers
String to tie nylons in place around eggs
Scissors to cut open nylons at the end
Light colored eggs (they don’t need to be white)
First, save your onion skins!
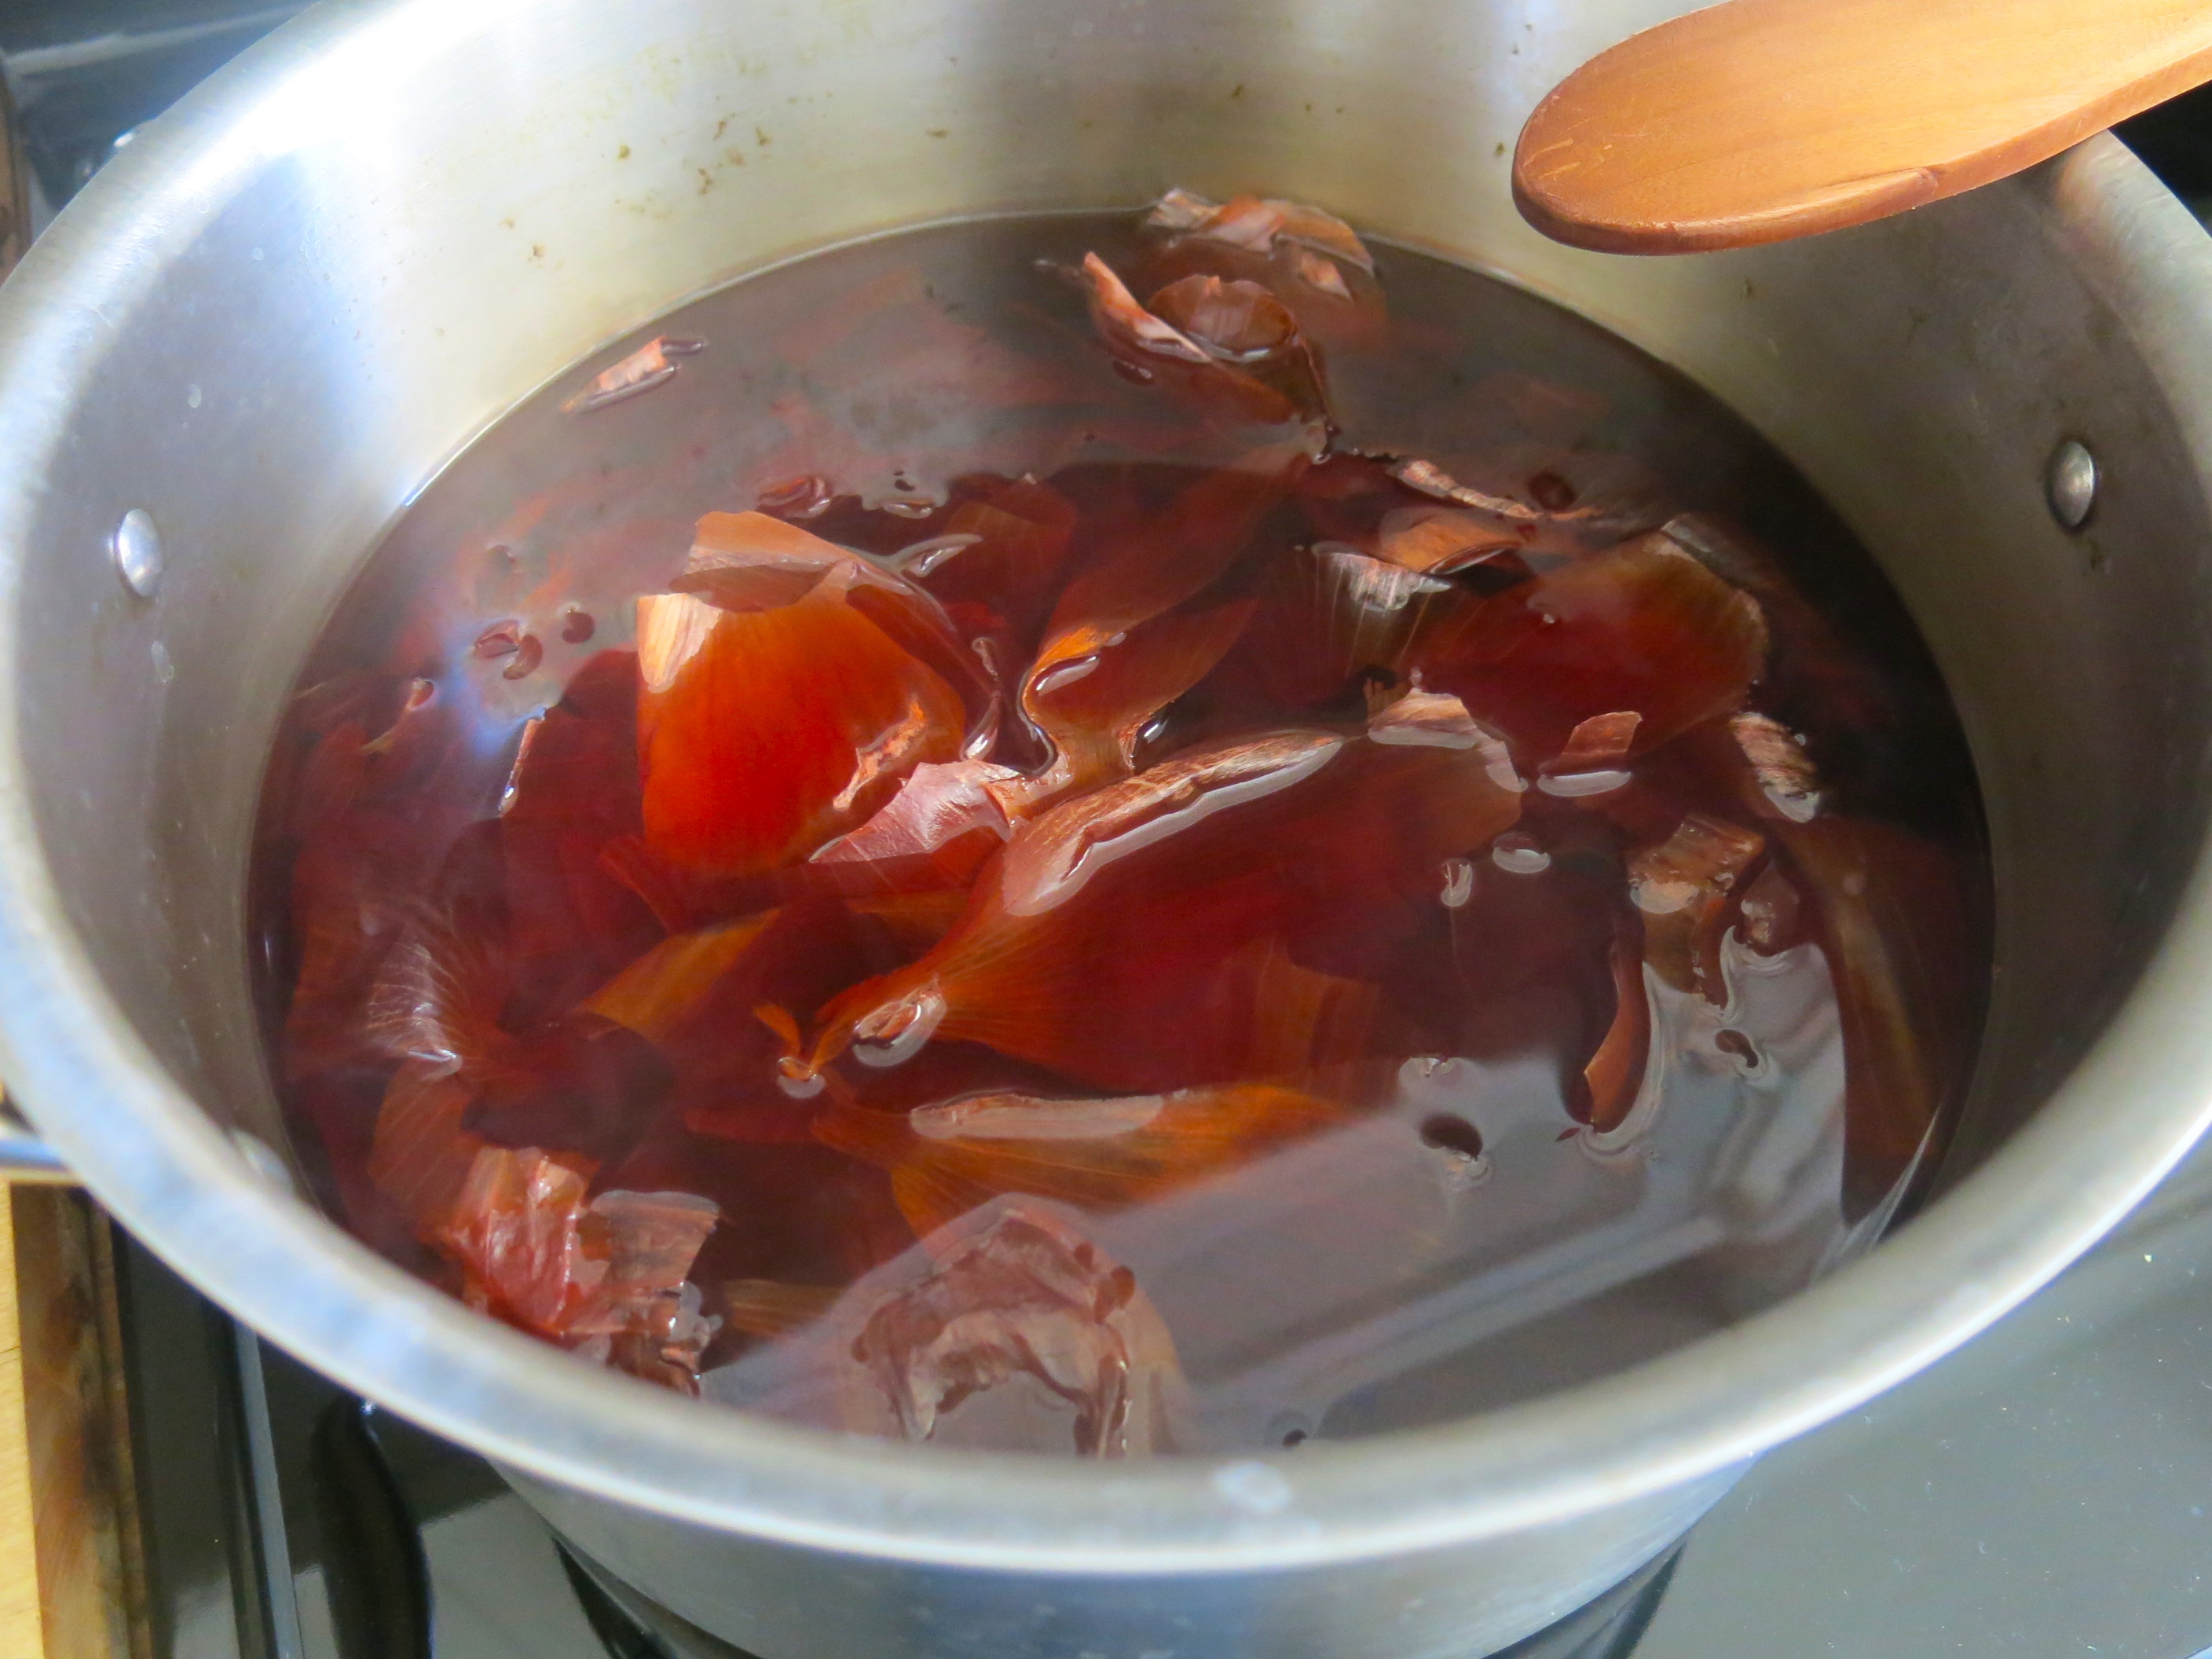
Second, simmer your onion skins for 20 min’s and set aside.
While your onion skins are cooling down and soaking a bit more, go and harvest your flowers and leaves… Plant parts that are fleshy and not rigid are the best. Rigid plant parts are hard to shape onto the egg and hold in place.
Then, set up your bundling station on a table. Put a little bowl of water in your bundling station as you will need water to wet the area on the egg where you want the plant material to stick. It just helps with the bundling process.
Here is what our bundling station looked like (a lot going on here, lol):
To bundle an egg for dyeing, chose the plant material you want…wet the egg a bit…smooth the plant material on there…wrap the egg in nylons…tie the string securely…and put the egg aside in a basket or bowl.


Next, bring your onion skin dye bath back to a simmer or low boil. You do not need to strain the onion skins out of the dye bath. Place each egg in the dye bath carefully and let simmer for 10 minutes. Then, turn off the heat and let it cool for 20 minutes or so.

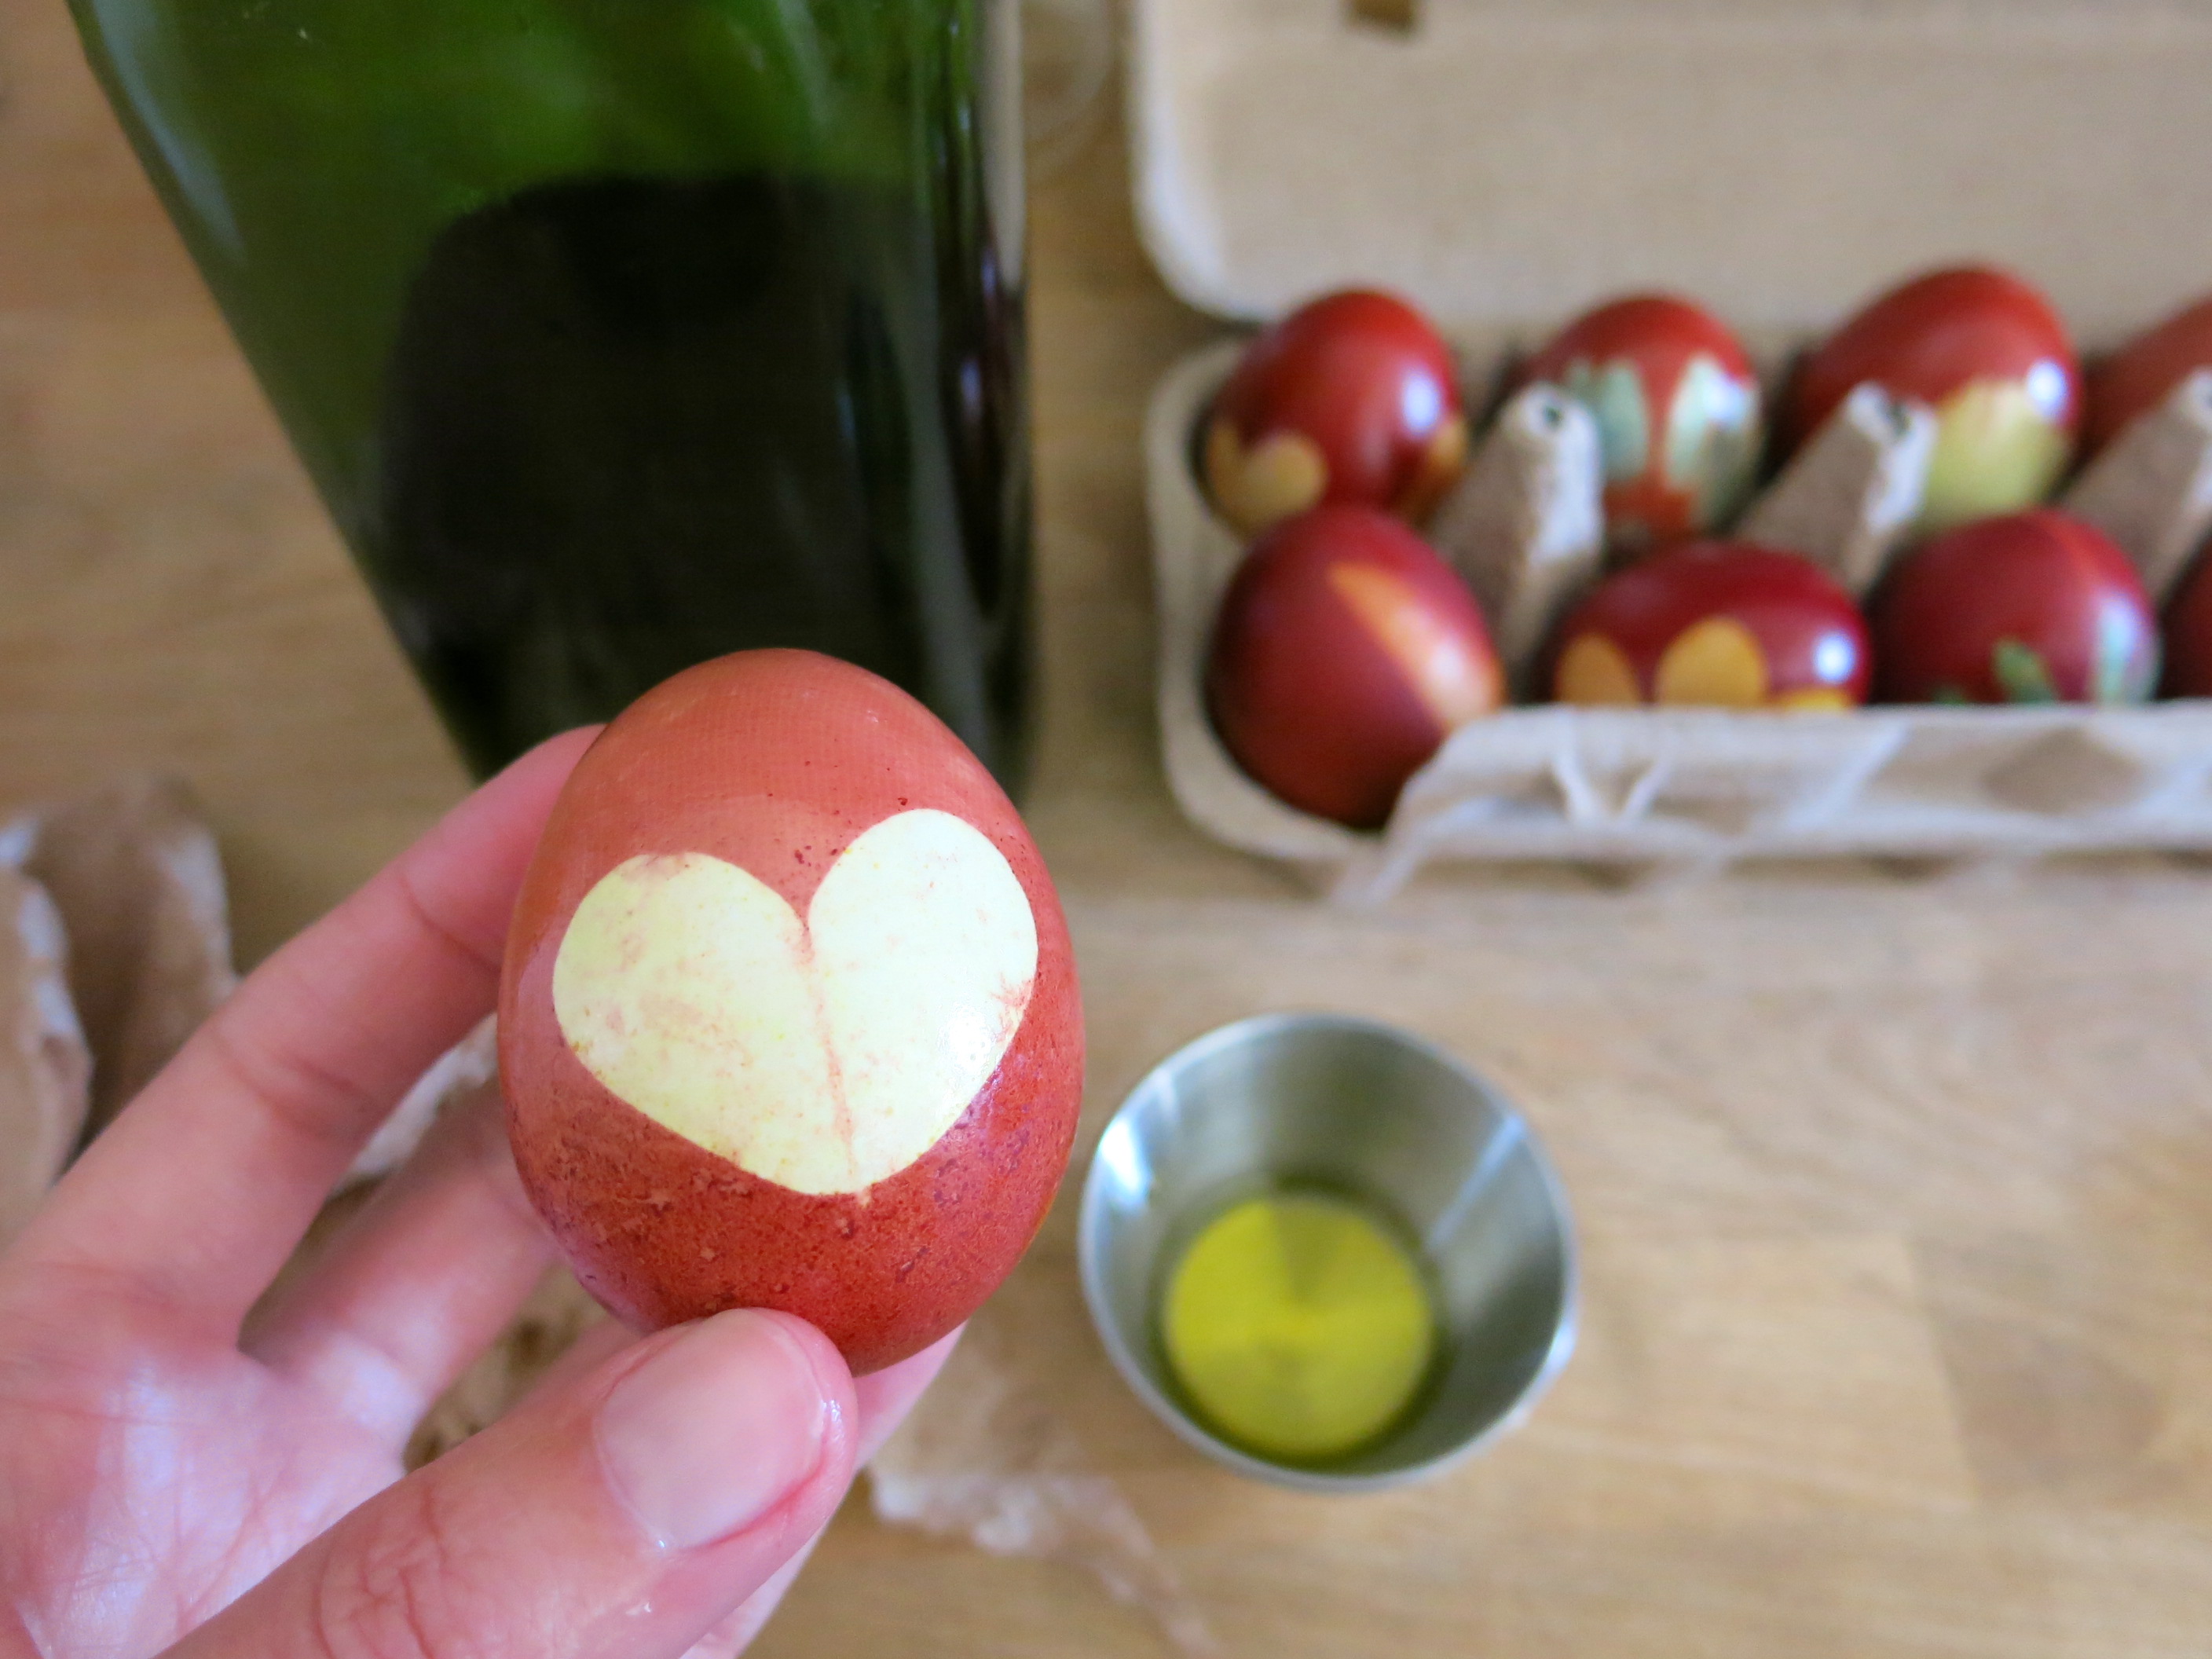
After the dye bath has cooled a bit, scoop each egg out onto a plate or bowl. And then, enjoy opening up each nylon bundle to reveal your botanical printed eggs! You can gently rub the egg with your finger under some running water (or in a bowl of water) to clean any remaining plant material.
Pat the egg dry and then run a little dab of olive oil on each egg so that it will shine a bit. Place the ‘polished’ egg into the egg carton. You can eat and really appreciate these hard boiled eggs!

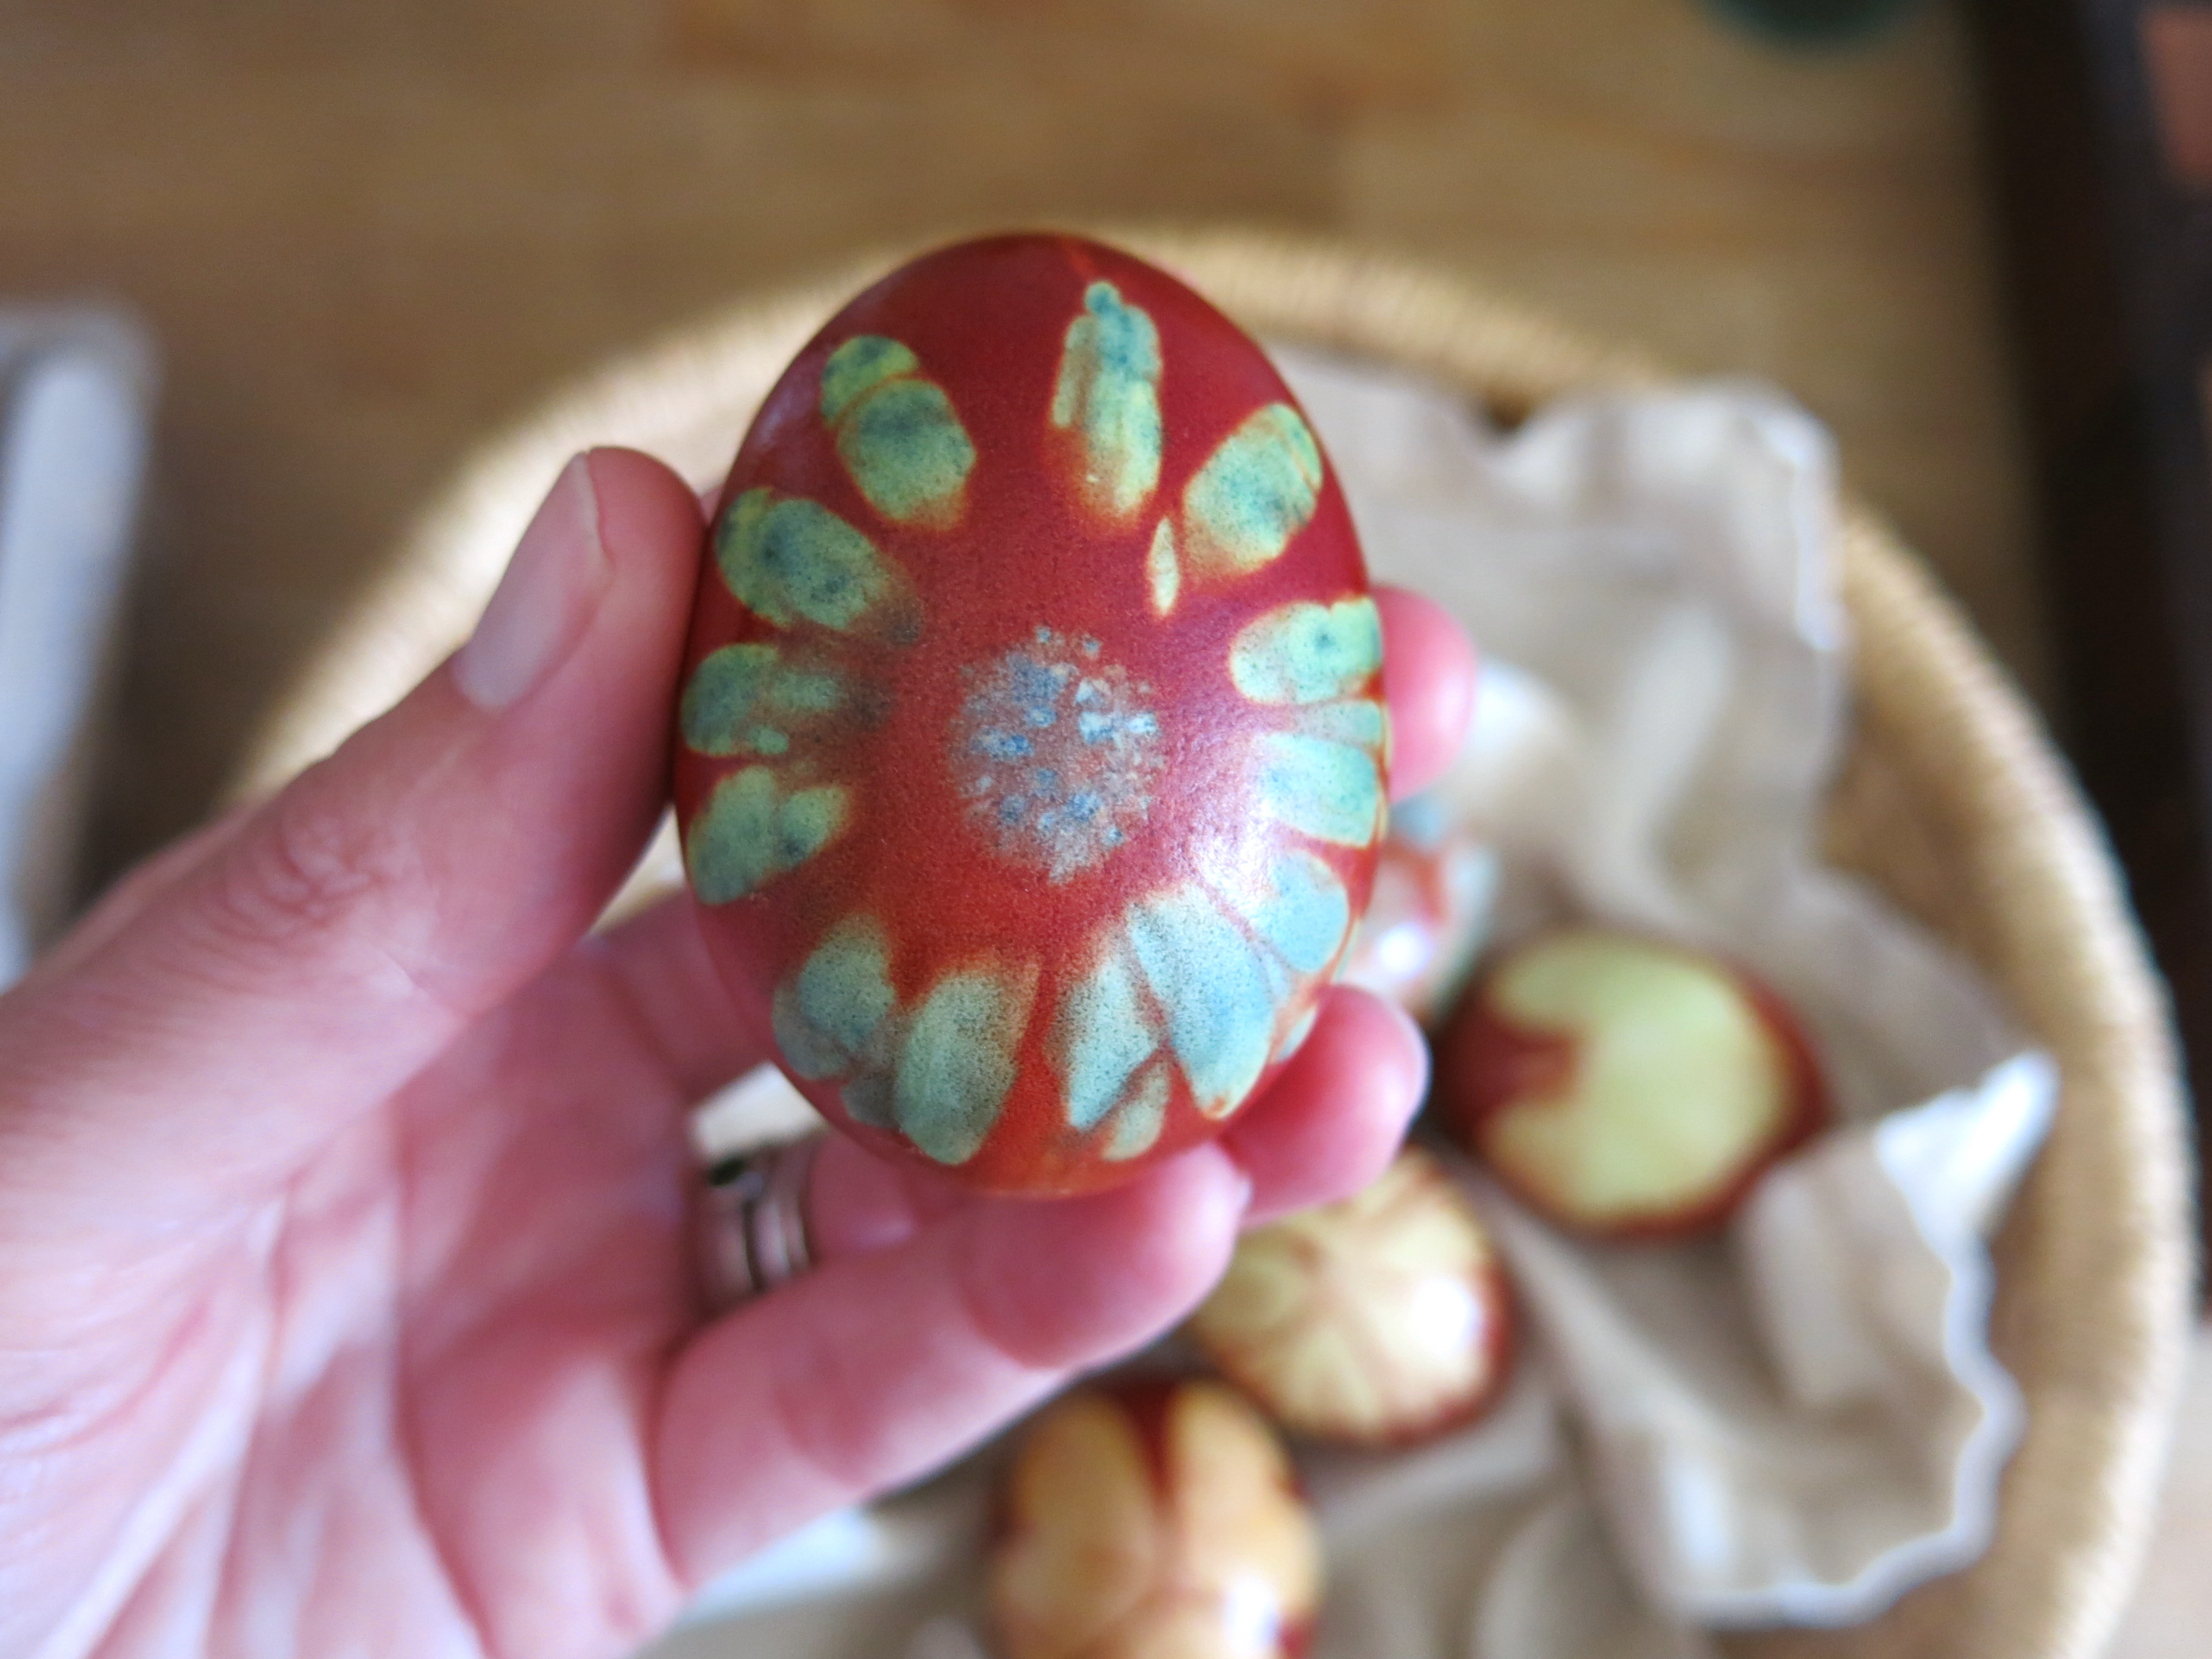
This is a picture of my favorites. The blue flower is actually from a purple African daisy used in the landscaping around our home. We also used wild geranium leaves, mallow leaves, sourgrass leaves, and ceonothus leaves. Taking off one segment of the three part sourgrass leaf became a heart shape. My daughter quickly saw that and made a heart print on a few of the eggs.
PLEASE be sure that the plant parts that you select for dyeing are safe, edible or medicinal plants as you will be simmering them with your eggs that may very well be eaten. If the plant is used for cooking or in herbalism, you are safe! Happy dyeing!


These are beautiful!
Thank you, Margaret ~ it was a very satisfying process and experience!