
Art by the late Fritz Baumgarten, a German illustrator of children’s books
I’ve moved a good bit over the years. However, my roots are deep in the South and, when I add up the years, most of them have been in the South.
I lived in western North Carolina in the hollers of the Southern Appalachian mountains for a few of those Southern years (it is definitely on the edge of the South). It was during that time, going through a full immersion in how time moves in nature, that I began to chart what I call the “fruit wave” (something that the critters in the image above must be riding, smile).
I noticed that mulberries were the first, then black raspberries, then raspberries… blackberries… blueberries… And so on and so forth. It was endearing to be around such ripening at all times.
Back in those misty mountains, as the coolness of fall moved in, the apples would ripen. On my walks on forgotten dirt roads crisscrossing a forgotten land, I would find dozens upon dozens of formerly cultivated and feral apple trees.
All shades of green. All shades of red. All kinds of tastes from sour to astringent to sweet. It was a true Garden of Eaten. Most of what ripened fell to the ground to rot. It was that time of year that I always saw the pulpy remains and seeds of apples in bear scat (someone knew where the good stash of fruit was).
Since then, I’ve been able to keep a pretty good finger on the “fruit wave” after having such a good teacher. I’ve found different ways to store, preserve, and enjoy these fruits.
One of my favorite ways to partake of seasonal fruit is with a simple galette. I started making galettes in my San Francisco days after a foodie friend of mine taught me. I would make them from spelt flour.
Galettes are a great way to enjoy a low-sugar, hearty desert that leaves you satisfied. The galette really highlights the seasonal fruit and doesn’t slam your taste buds with sugar like most desert recipes do.
Since my sensitivity to gluten has increased over the years, for whatever reason that may be (glyphosate anyone? over-hybridization anyone?), I’ve been experimenting more and more with nut meals and alternative flours. My recent experiment with a strawberry galette was inspired by a baker who blogs. I adapted her recipe to suit my needs.
I kept much of the recipe the same, just changed a couple of ingredients and deleted the dark chocolate chunks. I also hand processed rather than use a food processor.
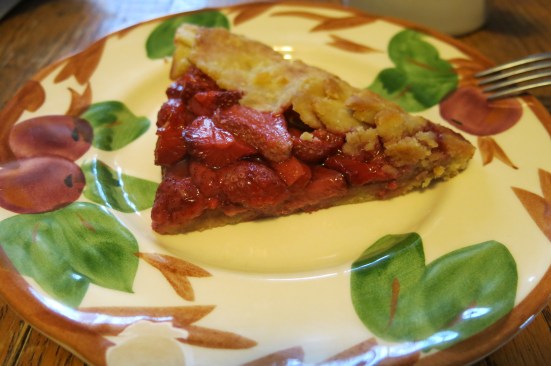
A slice of the strawberry galette, nom nom nom…
Seasonal Fruit Galette
For the crust:
1 1/2 cup almond flour
1/2 cup arrowroot powder
1 tablespoon coconut sugar
a hearty pinch of sea salt
6 tablespoons cold grass-fed butter, cut into pieces (I just whittle chunks off the butter
stick with a sharp paring knife into the bowl)
1 egg
Mix the dry ingredients together.
Whittle the butter into the bowl.
Toss in the egg and mix well.
Use your hands to work the egg into the batter evenly; keep the butter in small chunks throughout the dough so that the crust can get crispy when it bakes.
Make a ball with the dough, set it in the bowl and place in the fridge for 1 hr.
For the filling:
2 1/2 cups fresh strawberries, cut into slices (or whatever other fruit you have on hand)
1 tablespoon vanilla extract
1 tablespoon tapioca flour
1 tablespoon pure maple syrup
When you’ve got about 20 minutes left for the dough to sit in the fridge, start on the filling.
Place the strawberries in a bowl.
Toss the tapioca flour in the bowl and lightly dust all the strawberries by stirring.
Toss in the maple syrup and vanilla extract and stir. Put aside.
Preheat the oven to 375 degrees.
Take the dough out from the fridge and work it with your hands a little bit to get it ready to roll out. Make a rough, flat circle shape.
Place the dough between two pieces of parchment paper and roll the dough out to about 10-12″ circle, keeping it thick enough to keep form when you wrap the fruit.
Place the dough on the sheet of parchment on your baking sheet.
Place the fruit in the center of the dough leaving about 2″ of dough on the edges.
Use the parchment paper to fold up the sides and cover the edge of the fruit.
Bake in the oven for 30 minutes or until crust browns.
Remove and let cool for 10 minutes before serving. ENJOY!
